What Every Property Manager Needs to Know About Duct Mold Removal
Duct mold removal is one of the most urgent — and most overlooked — maintenance issues in commercial and residential properties alike.
Here is a quick overview of what to do if you suspect mold in your air ducts:
- Shut off your HVAC system at the thermostat and breaker immediately.
- Do not use bleach or vinegar — they damage ductwork and cannot kill mold roots.
- Assess the scope — surface mold on vent covers may be handled with proper PPE; anything inside the ducts requires a professional.
- Call a certified remediation contractor if mold covers more than 10 square feet, if you smell persistent musty odors, or if occupants are experiencing symptoms.
- Fix the moisture source first — without it, mold returns within 24 to 48 hours regardless of how well you clean.
That musty smell drifting from your vents the moment the AC kicks on? It is not stale air. It is often a warning sign that mold has taken hold inside your ductwork — and your HVAC system is actively spreading spores to every room in the building.
Americans spend about 90% of their time indoors, where air pollution can actually be worse than outside. When mold colonizes an HVAC system, it does not stay in one spot. A standard residential air handler moves 400 to 2,000 cubic feet of air per minute — enough to distribute spores throughout an entire property in a matter of hours.
The problem is bigger than most people realize. More than 45 million buildings across the U.S. have unhealthy mold levels, and ductwork is one of the hardest places to detect it — and one of the easiest places for it to spread unchecked.
This guide walks you through exactly what causes duct mold, when you can safely address it yourself, and when it is time to call in certified professionals.
I’m Terry Zastrow, owner of ZBM, Inc., an IICRC-certified firm with approximately 30 years of experience in professional cleaning, mold remediation, and restoration services — including duct mold removal for state agencies, municipalities, housing authorities, and commercial clients. With that field experience behind this guide, you can trust that what follows reflects real industry standards, not guesswork.

Duct mold removal further reading:
Understanding the Danger: Causes, Signs, and Risks of Duct Mold

Mold is a biological survivor. It does not need a fancy invitation to move into your home; it only needs three simple ingredients: moisture, a food source, and a dark, stagnant environment. Unfortunately, your heating, ventilation, and air conditioning (HVAC) system can easily provide all three.
When warm, humid air collides with the cold metal surfaces of your air conditioning ducts, condensation forms. This temperature differential acts like a cold glass of iced tea on a hot summer afternoon in Southeast Wisconsin, leaving beads of water dripping inside your dark system. Combine this moisture with organic dust — which is mostly made of skin cells, pet dander, and pollen settling in your system — and you have a five-star buffet for mold spores.
Without proper moisture control, what starts as a tiny spore can quickly turn into a full-scale colony. If you suspect there is a larger moisture problem behind your walls feeding into this system, it is crucial to understand the scary truth about mold hiding inside your walls before it compromises your entire living space.
Moisture, Humidity, and the 24-Hour Germination Window
Time is your worst enemy when it comes to mold. Once a water leak occurs, or high relative humidity levels spike above 60%, mold spores can germinate and begin growing hyphae (their root structures) within 24 to 48 hours.
In places like Dodge County and Jefferson County, WI, summer humidity can climb rapidly. If your air conditioner is oversized, or if your condensate drain line gets backed up, moisture pools in your drip pan. To prevent this, we recommend keeping your indoor relative humidity strictly between 30% and 50% using a digital hygrometer to monitor conditions. If you experience a plumbing leak or roof leak that drips into your ceiling-mounted ductwork, you must dry the area completely within 48 hours to avoid needing extensive, professional safe mold removal.
How Duct Materials Impact Mold Growth
Not all air ducts are created equal, and the material of your ductwork heavily dictates how mold behaves and how we must treat it:
- Sheet Metal: Smooth, galvanized sheet metal ducts are the easiest to clean. Mold can grow on the dust layer inside them, but because metal is non-porous, the mold cannot root itself into the material. It can usually be thoroughly sanitized.
- Fiberglass Insulation: Many ducts are lined internally with fiberglass insulation for soundproofing and temperature control. If this fiberglass gets wet and moldy, it cannot be cleaned. The porous fibers allow mold hyphae to weave deep inside. The only solution is complete removal and replacement of the contaminated insulation.
- Flexible Ductwork (Flex Duct): Made of thin plastic over a wire coil, flex duct is highly susceptible to tearing and trapping dust in its ridges. If mold takes root in the plastic or insulation jacket of flex duct, replacement is almost always more cost-effective and safer than trying to scrub it clean.
Symptoms of Mold Exposure and Indoor Air Quality
Because your HVAC system circulates air throughout your entire home, breathing in duct mold is not a localized problem. Mold spores, fragments, and mycotoxins bypass your body’s natural filters, triggering a range of health issues.
Occupants often experience persistent nasal congestion, sneezing, itchy eyes, and severe asthma triggers. Over time, prolonged exposure can cause headaches, chronic fatigue, and cognitive fog. These symptoms are particularly dangerous for vulnerable populations, including infants, the elderly, and anyone with a compromised immune system. When the air you breathe is continuously recycled through a contaminated system, it creates a persistent cycle of indoor air pollution. If you are dealing with particularly stubborn or dangerous mold strains, you may want to read about the 5 types of toxic mold: why you need biohazard cleanup.
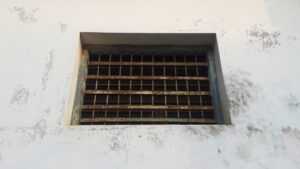
Visual and Olfactory Clues in Your Vents
How do you know if you have mold or just harmless household dust?
- The Sniff Test: Mold has a distinct, earthy, damp, and musty odor. If this smell becomes significantly stronger the moment your fan or AC kicks on, the mold is likely inside your ductwork.
- The Visual Check: Dust settles uniformly across vent grilles and looks gray, dry, and fibrous. Mold, on the other hand, grows in patchy, circular, or fuzzy patterns. It can appear black, dark green, white, or gray.
- Drip Pans and Evaporator Coils: Peer into your HVAC system’s access panel. If you see standing water in the drip pans or fuzzy growth covering your evaporator coils, mold is actively colonizing your air stream.
The Truth About DIY Duct Mold Removal
We love a good weekend project as much as any Wisconsin homeowner, but when it comes to duct mold removal, there are strict boundaries you should not cross.
According to EPA guidelines, homeowners should only attempt DIY mold cleaning if the visible mold covers less than 10 square feet and is limited to easily accessible surfaces (like your outer vent covers). If the mold extends deep inside your metal trunk lines, or if it has colonized porous fiberglass, DIY attempts will only agitate the colony, releasing millions of spores into your air.
If you do attempt minor surface cleaning, you must wear proper safety gear, including an N95 respirator, safety goggles, and chemical-resistant gloves. To learn more about the science of eliminating these resilient spores, check out our guide on the secret to killing black mold permanently.
Why Bleach and Vinegar Fail at Duct Mold Removal
The internet is full of blogs telling you to spray bleach or vinegar down your vents. Please, do not do this.
First, household bleach is highly corrosive to galvanized sheet metal. Spraying it inside your ducts can degrade the metal, leading to expensive leaks and structural damage. Second, bleach contains about 90% water. On porous materials like wood or fiberglass, the chlorine chemical evaporates on the surface, while the water sinks deep into the material — literally feeding the mold’s root structures (hyphae) and causing it to return stronger than before. EPA-registered, botanical-based disinfectants are the only safe and effective choice for HVAC systems.
When to Attempt Safe Surface Cleaning
If you have verified that the mold is strictly limited to your metal vent grilles or the immediate drywall surface surrounding the register, you can follow these safe DIY steps:
- HVAC Shutdown: Turn off your heating and cooling system at both the thermostat and the main circuit breaker. You do not want the fan turning on while you are cleaning, which would suck loose spores deeper into the return lines.
- Gear Up: Put on your N95 mask, protective goggles, and gloves.
- Remove Vent Covers: Unscrew the vent covers and submerge them in a tub of warm water mixed with a mild detergent or an EPA-registered mold cleaner. Scrub them thoroughly with a soft brush and let them dry completely.
- HEPA Vacuuming: Use a vacuum equipped with a true HEPA filter to clean around the interior vent opening. Do not use a standard shop vac, as its filter will simply blow the microscopic mold spores right back out into your room.
- Wipe Down: Wipe the surrounding hard surfaces inside the duct opening with a microfiber cloth dampened with an EPA-registered sanitizer.
- Thorough Drying: Ensure every single surface is dry to the touch before reattaching the vent covers and turning your system back on.
What To Expect from Professional Duct Mold Removal

When mold has spread deep into your HVAC trunk lines, it is time to put down the scrub brush and call the pros. Professional duct mold removal is a highly specialized process governed by strict industry protocols, such as the IICRC S520 Standard for Professional Mold Remediation and NADCA (National Air Duct Cleaning Association) standards.
When you hire a certified team, they do not just show up with a vacuum. They establish physical containment barriers using heavy-duty plastic sheeting and set up negative air pressure machines equipped with HEPA filtration. This ensures that as they agitate and clean the inside of your ducts, not a single mold spore escapes into your clean living spaces. If you want to make sure you are hiring the right team, read everything you need to know about professional mold remediation experts.
The Step-by-Step Professional Remediation Process
To help you understand the difference between a standard dust cleaning and a true mold remediation job, we have broken down the processes:
| Feature | Standard Duct Cleaning | Professional Mold Remediation |
|---|---|---|
| Primary Goal | Remove dust, pet hair, and loose debris. | Kill, physically remove, and prevent mold spores. |
| Containment | Minimal or none required. | Full plastic isolation barriers & negative air pressure. |
| Equipment | Standard rotary brushes and vacuums. | HEPA-filtered vacuums, mechanical whips, foggers. |
| Chemicals Used | Optional mild deodorizers. | EPA-registered botanical sanitizers & fungicidal sealants. |
| Material Handling | Cleans surface dust from fiberglass. | Replaces contaminated porous fiberglass insulation. |
The professional process starts with a thorough inspection (often using specialized duct cameras). Once containment is established, technicians use mechanical agitation tools — like pneumatic whips and brushes — to dislodge mold from the duct walls while a high-powered, truck-mounted HEPA vacuum pulls the debris out of your home. Finally, a post-remediation verification is performed to ensure your air is clean and safe.
Advanced Technologies: System Fogging and Negative Air Pressure in Duct Mold Removal
One of the most effective methods for treating hard-to-reach areas in ductwork is system fogging. Using Ultra-Low Volume (ULV) fogging machines, professionals introduce a fine mist of EPA-registered, botanical-based antimicrobial agents (often utilizing natural compounds like thymol) into the ductwork.
These micro-droplets (ranging from 5 to 50 microns in size) remain suspended in the air long enough to coat every bend, joint, and crevice that mechanical brushes simply cannot reach. This process neutralizes both active mold spores and lingering mycotoxins, leaving behind a bacteriostatic shield that can provide residual protection for up to six months, provided indoor humidity remains below 50%. For more information on maintaining healthy indoor air quality and when to clean your system, you can consult the EPA’s guide on air duct cleaning.
Frequently Asked Questions About Duct Mold
How much does professional duct mold remediation cost?
Remediation pricing depends heavily on the size of your HVAC system, the accessibility of your ductwork, and the extent of the contamination. A basic cleaning and sanitization of a standard residential metal duct system can run between $700 and $1,500. However, if your system features moldy fiberglass lining or flexible ducts that require complete replacement, costs can range from $2,000 to $4,000 or more. To plan your budget, consult our comprehensive mold abatement cost guide.
Can mold in air ducts make my pets sick?
Yes, absolutely. Our furry family members are highly vulnerable to airborne mold spores. Because pets spend their time closer to floor vents where dust and spores settle, they can quickly exhibit symptoms like continuous scratching, skin irritation, frequent sneezing, running eyes, and lethargy. If your vet cannot find an obvious cause for your pet’s sudden allergies, it is time to check your air vents.
How often should I inspect my HVAC system for mold?
We recommend performing a visual seasonal inspection of your vent covers and drip pans twice a year — once in the spring before turning on your AC, and once in the fall before firing up your furnace. Additionally, the U.S. Department of Energy recommends replacing your HVAC air filters every 1 to 3 months to maintain proper airflow and prevent dust buildup from feeding potential mold colonies.
Conclusion
At the end of the day, your home should be a safe haven, not a source of respiratory stress. Addressing mold in your air ducts is not just about wiping away unsightly black spots; it is about protecting your family’s health, preserving your HVAC system’s efficiency, and maintaining your property’s value.
The absolute key to permanent mold control is moisture control. By keeping your relative humidity low, replacing your filters regularly, and keeping your drip pans clean, you can prevent mold from ever finding a foothold in your system.
If you suspect your system has a mold issue beyond a simple surface clean, do not wait for the problem to spread. ZBM Inc. is a licensed, bonded, insured, and family-owned business. Our certified professionals serve Watertown, WI, Dodge County, Jefferson County, Lake Mills, and the surrounding Southeast Wisconsin and Northwoods regions.
We bring decades of hands-on, certified restoration experience to ensure your indoor air is clean, fresh, and safe. Contact us today to schedule a professional inspection and take back control of your home’s air quality!